
This post is just notes from my own learning, do expect errors in writing!
Objectives:
Describe the security benefits of implementing network segementation
Network segmentation can be used to secure access to data by dividing the network into multiple areas. This helps prevent an attacker from gaining access to key resources
They are factors to consider before implementing network segementation, such as deciding who in your organisation needs access to what. You could consider how the comprimise of data could affect your organisation.
The user to data access is an important factor when it comes to segmenting the network. When implementing the principle of least privilege should be used
Regulatory or law requirements is another factor that needs to be considered. Failure to adhere to this can result in data loss, goverment or regulatory fines, lost customer confidence or in a worst case, loss of the entire business.
A zero trust architecutre fixes the deficiences of a perimeter only architecture. Zero trust is based on the principle to:
‘Never Trust, Always Verify’
After the network is segmented using subnets or VLANs, firewalls with security zones should be used to control traffic between these segements of the network.
Here is a diagram of a zero trust network, note how every VLAN goes through the firewall and a seperate zone:
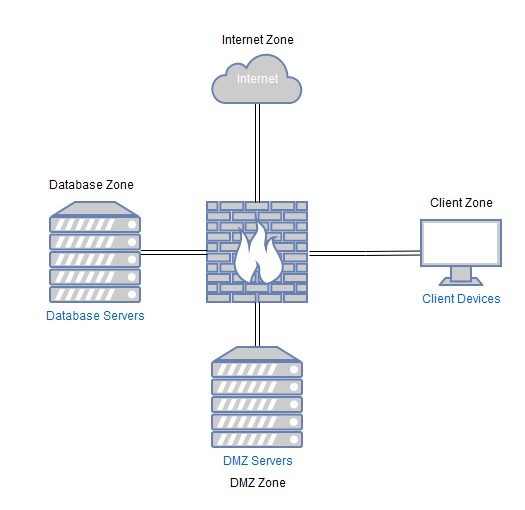
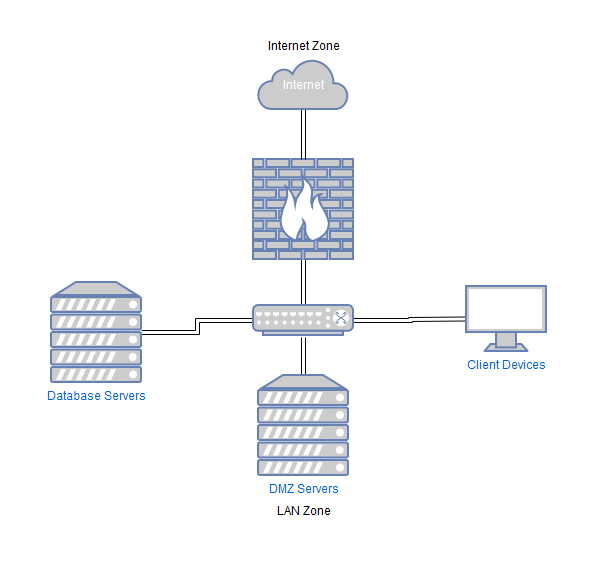
Network segementation as in the north east south west setup above, can massively reduce the attack surface of the organisations network if implemented correctly
Configure firewall security zones to implement network segmentation
Click Add Rule under Security Policies
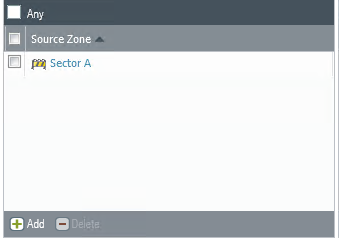
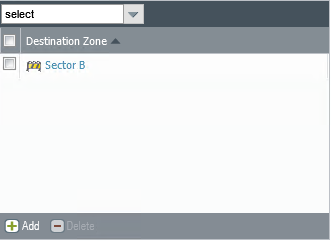
Add the Destination Zone

An example of permitting traffic between zone Sector A and zone Sector B. This rule currently permits all traffic between the zones but the rule can be tightened by permitting only certain applications or services. Note that inter-zone traffic is blocked by default
Configure a Zone Protection Profile or denial of service Protection policy to mitigate denial of service or reconnaissance attacks
Denial of service attacks are meant to overload or shut down a network, host, or service.
Denial of service attacks attempt to accomplish this by flooding the target with traffic, or sending malware that triggers a software crash.
By crashing the network, host, or service the attacker deprives any legitimate users from access to the service or resource.
This can cost the victim substantial time and money.
The Palo Alto firewall has features to protect against multisession and single-session denial of service attacks.
Overview of a Multisession attack:
Type 1 – Multisession from Single Host
A single device attempts to establish a high rate of connections per second (cps). Each connection attempt tries to initialise a new firewall session.
To mitigate this attack, implement a Zone Protection Profile or Denial Of Service Protection Policy
Type 2 – Multisession from Multiple Hosts
This is also known as a distributed denial of service attack, or DDoS
Multiple devices attempt to establish a high rate of connections per second to a single host. Each connection attempt tries to initialise a new firewall session.
The below Palo Alto CLI command allows you to monitor the firewall connection per second rate:
show session info | match "Number of allocated sessions"
To mitigate this attack, configure a Zone Protection Profile, ask your internet service provider to black-hole your targeted IP addresses, or deploy a dedicated anti denial of service application.
Overview of a Single Session Denial of Service Attack
A single-session denial of service attack is launched from a single host. This single host tries to transmit as much data as possible to the target destination.
These type of attacks can be identified by a high packet rate in an established firewall session.
The below CLI command allows the user to monitor the packet rate:
show session info | match "Packet Rate"
To mitigate this type of attack, enable packet buffer protection or discard the session altogether by using this CLI command:
request session-discard id <session_id>
Mitigating Denial of Service attacks in Palo Altos.
Pointers on the Denial of Service protection within Palo Alto Firewalls:
- Palo Alto firewalls use packet header information to detect threats to the network
- An advantage is the detections are packet-based rather than signature-based
- The denial of service protections are not linked to any security policy, they are deployed before the security policy comes into play
Two primary technologies come into play for denial of service protection on Palo Alto Firewalls:
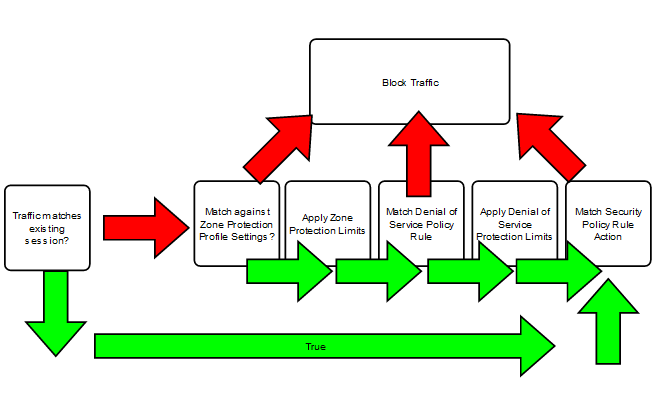
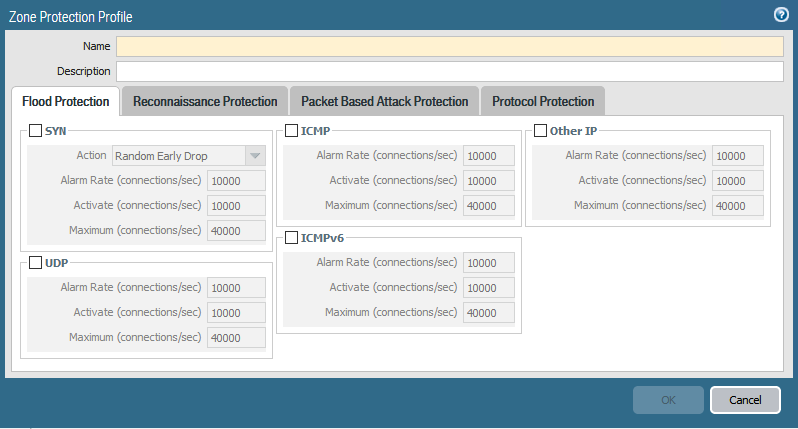
A Zone Protection Profile provides pre-session, broad-based, comprehenisive denial of service protection at the edge of your network to protect organisations from denial of service attacks. The Zone Protection profile protects against the most common of TCP SYN, UDP, ICMP and other IP based flood attacks
The Protection Profile is applied per zone to ingress traffic, packets that are not already associated with an existing session are counted towards an aggregate connection rate. This is measured once per second
If the aggregated connection rate exceeds and is detected as a flood Palo Alto firewalls have two methods to protect against flood attacks. These are:
- Random Early Drop
- Exclusively used for UDP, ICMP, and IP based flood mitigation. Can be used for TCP SYN flood mitigation
- SYN Cookies
- Used for SYN flood mitigation
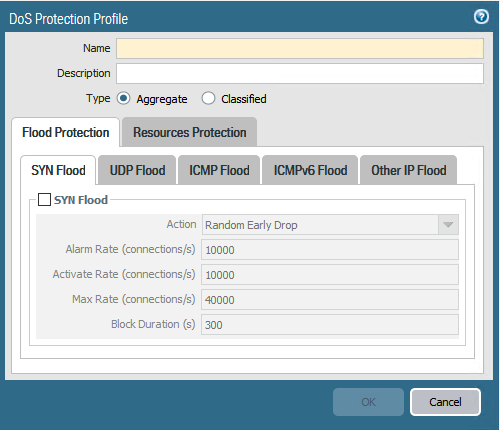
Random Early drop works with three thresholds, Alarm Rate, Activate, and Maximum.
SYN packets that do not match an existing session are logged to the Threat log if it exceeds the Alarm Rate connections per second threshold.
Random Early drop is activated once the Activate Threshold is exceeded. Once activated, the firewall will begin to randomly drop packets.
If the maximum threshold has been reached, then the firewall will drop all SYN packets that exceed the Maximum connections per second threshold.
If Random Early Drop is eanbled, the firewall will drop some legitimate traffic along with flood traffic
SYN cookies is to prevent half open TCP connections from exhausting memory resources oin a target server that is flooded with illegitimate TCP SYN packets
When the firewall uses SYN cookies, it’ll record information such as: maximum segment size, TCP window scaling option, and selective acknowledgements.
SYN cookies is the recommended method to use over random early drop, as it wil not drop legitimate traffic.
It is also recommended not to enable SYN cookies if you’re data plane CPU is nearing maximum use.
Switching on Zone Protection

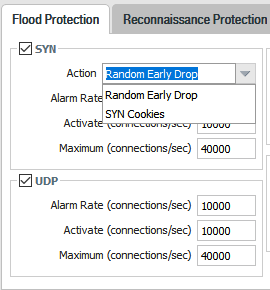
Flood Thresholds can be set in two ways: detect and log, or detect, log, and block denial of service attacks.
Flood Detector ensures the firewall detects a denial of service attack at a low connection per second raete while ensuring packets are not dropped by the firewall. Flood Detector set’s an alarm rate at a low rate to alert, but the Active and Maximum are set to very high levels to ensure legitimate traffic is not dropped.
Flood Blocker sets the Alarm Rate at a low level too. The difference from a Flood Detector is the Active and Maximum rate are set to much lower levels and are more likely to be invoked.
Recommendations for the Flood Thresholds are to set a Zone Protection Profile on an ingress zone to protect against floods. Consider a zero trust approach, with all protocol flood protections enabled using the SYN cookies protection method.
Adjust the specific flood thresholds applied to each zone by taking a base line measure for each flood type so that a normal traffic load for each zone can be determined. The alarm rate and threshold can be used to try determine the baseline, eventually being raised above 15%-20% of the baseline traffic.
Active threshold should be set roughly 10% above the Alarm Rate threshold, and the maximum threshold should be set roughly 20% above that of the Active Threshold.
It’s important to monitor these baselines over time.
The Denial of Service protection policy and denial of service protection profiles provide session-based flexible rules and matching criteria enabling the administrator to protect specific destination zones or end hosts.
These two technologies complement each other and should be deployed in tandem to achieve the best results against the different types of denial of service attacks observed on the internet today.
A Zone Protection profile can protect against host sweep reconnaissance scans, and defend against TCP and UDP port scans.
Port scans discover open ports on a network host. The port scanning tool sends requested to a large range of port numbers on a host to locate a service running on an open port.
Host sweeps contact multiple hosts to determine if a specific port is open and vulnerable to exploitation.
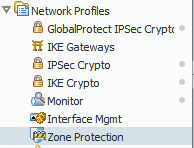
To enable Reconnaise Protection, open the Zone Protection Profile in the Palo Alto Management Interface and select the tab Reconnaisance Protection.
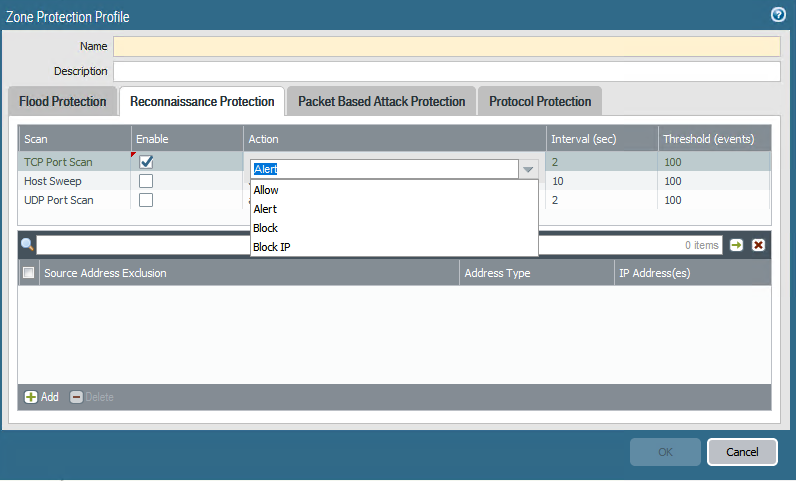
The recommendations for configuring ideal values for Reconnaissance Thresholds are exactly very similar to that of Flood Protection: Establish a baseline with default Interval and Threshold values. Once established set the Interval and Threshold values above the baseline, and Block/Block Ip above that.
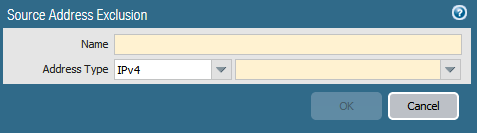
If the organisation is currently going under a penetration test, the administrator can whitelist the IP of the pentration tester on the smae Reconnaissance Protection tab.
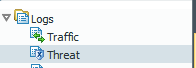
Alerts from the Reconnaissance Protection will be displayed in the Threat Log on the Palo Alto Firewall
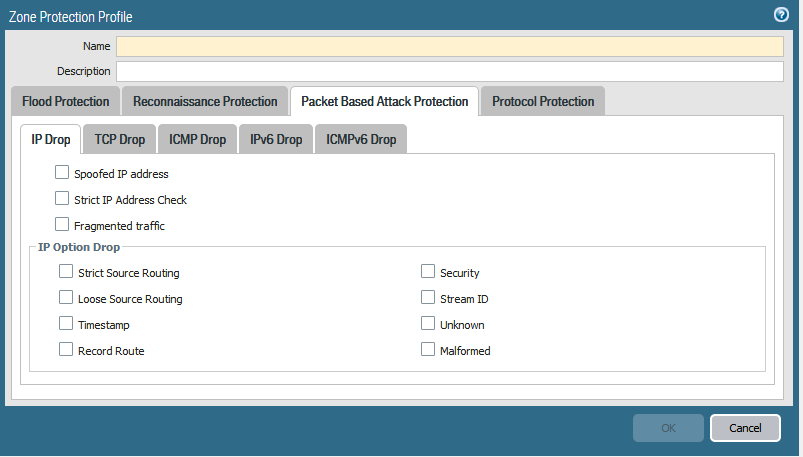
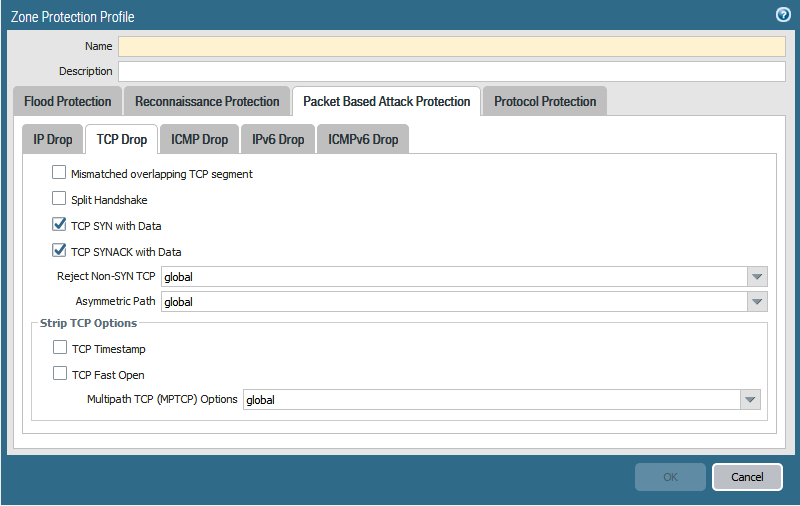
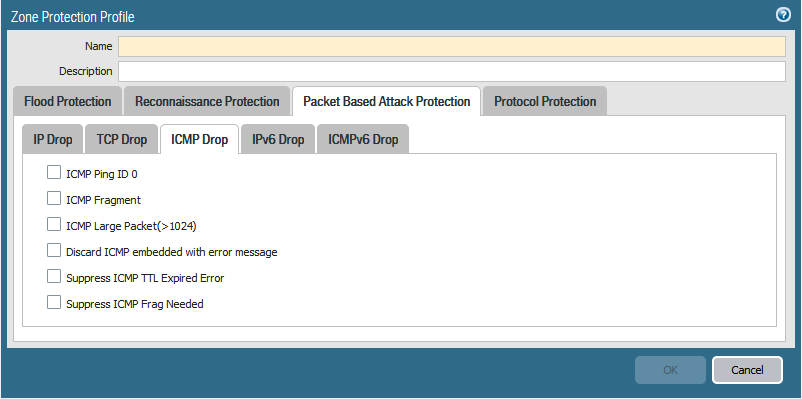
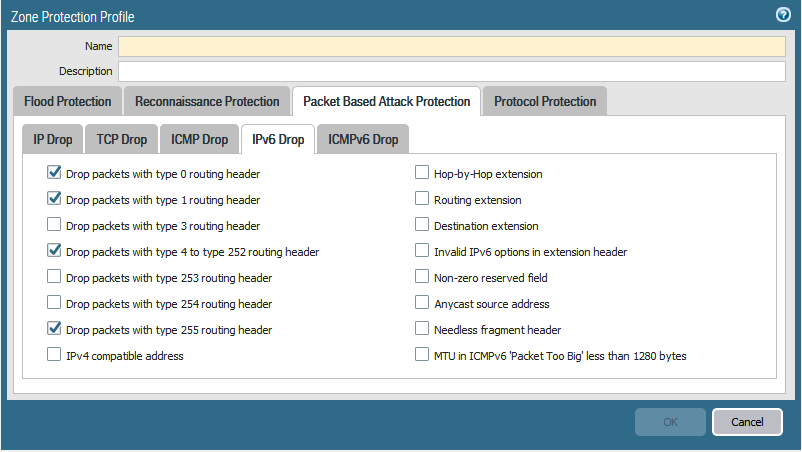
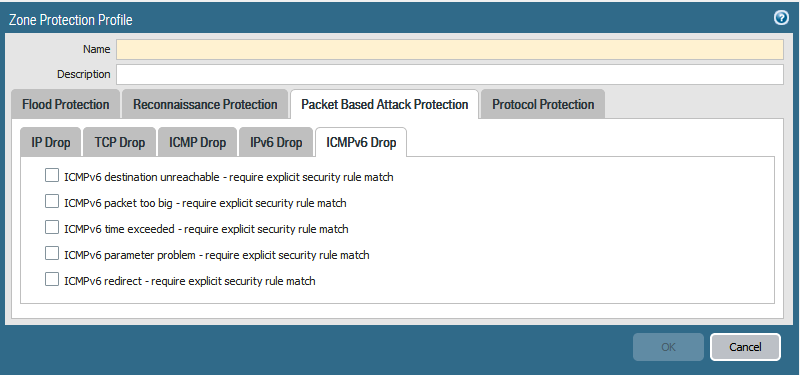
Zone protection also offers a defence against packet based attacks. The Zone Protection Profile can be configured to check IP, IPv6, ICMP, ICMPv6, UDP and TCP packet header parameters.
When the packet header fails a check against the Palo Alto firewall, the firewall can drop the entire packet and it’s undesirable characterisitics or strip undesirable options from TCP packet headers. Do note that the stripping of headers works for TCP packets only
You can set four different types of drop characteristics in the Zone Protection Profile. These are malformed IP packets, TCP SYN packets, SYN-ACK packets, or Fragmented ICMP packets.
Any drop options selected that are activated will be displayed in the Threat Log of the firewall.
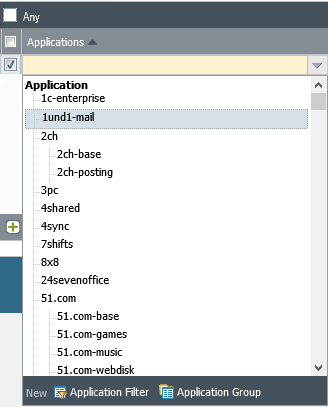
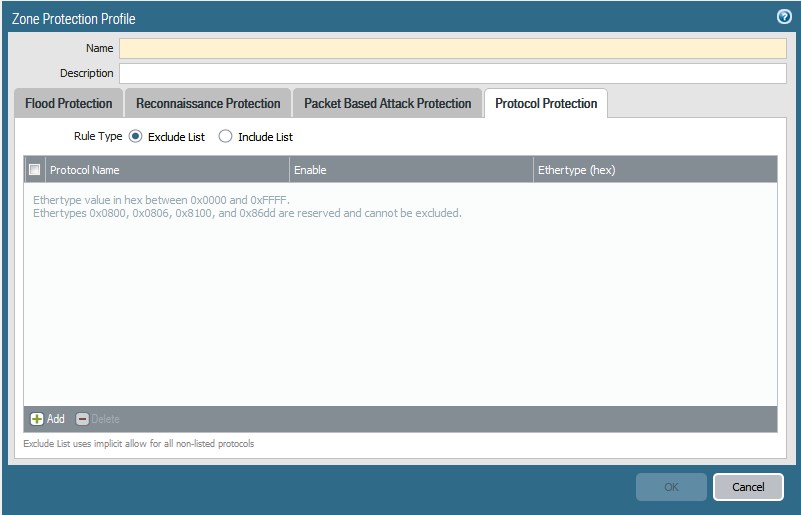
The last type of Zone Protection is Protocol Protection. This allows you to control what types of protocol are permitted or denied through the zones of the firewall.
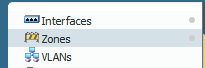
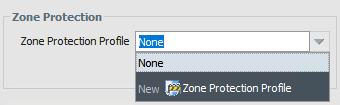
To enable Zone Protection, go to Network tab and select Zones
Select the zone you wish to modify, a new window will open up. Towards the bottom of the screen is a drop down box that allows you select the Zone Protection Profile
Denial of Service Protection Profiles and Policies
Denial of Service Protection comes in two parts, Policies and Profiles.
The Denial of Service Protection Policy defines the match criteria and action taken against that match criteria. The criteria can range in a number of different rules such as:
- Source zone or interface
- Source IP address
- Source User
- Destination zone or interface
- Destination IP address
- Service
If a match is found against the criteria, three different actions can be taken:
- Protect – Apply limits to the matching traffic passing through the firewall through ethier an Aggregate Profile or a Classified Profile
- Allow – Allow all packets through the firewall
- Deny – Deny all packets access through the firewall
If a rule is set to be Protect, matching traffic is controlled by the limits set in the Denial of Service Protection Profile. This can be an aggregate profile that applies limits all matching traffic, or a classified profile that applies limits to a single IP address.
The aggregate profile enables the creation of a maximum session limit for all connections matching the denial of service protection policy rule. The threshold will apply a maximum session limit to all IP addresses that match against the policy rule. once the maximum sessions limit is reached, no other new sessions can be created for any other IP addresses that match against the denial of service protection policy rule.
The classisifed profile enable sthe creation of a session limit that jsut applies to a single IP addres.
The firewall administrator can choose whether the single IP address is matched to the source, destination, or both source or destination address.
Both of these profile types can be applied do a Denial of Service Protection Policy rule. A typical usage scenario is that the aggregate profile limits are generally greater than the classified profile limits.
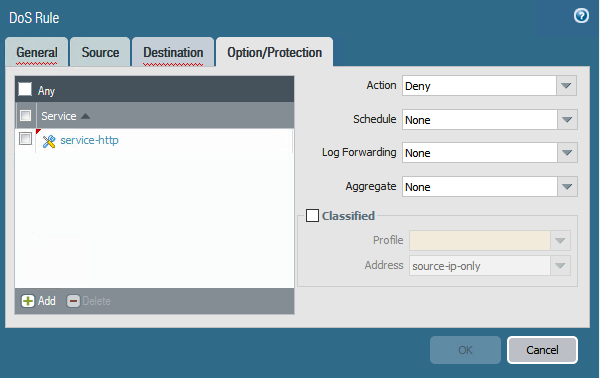
To configure a Denial of Service Protection Profile, under Objects tab select DoS Protection
To configure a DoS protection policy, select Policies on the top tab and navigate to DoS Protection

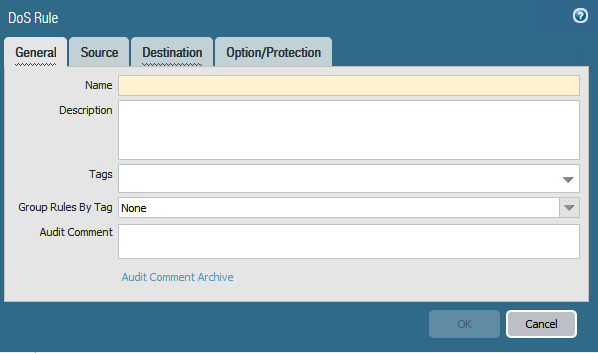
In the Denial of Service Protection Configuration Window, Source and Destination zones or interfaces can be selected. Particular services (such as HTTP or VNC) can be protected against rather than covering any service that transmits through the firewall zones. Under the Option/Protection tab the Aggregate and/or Classified profiles can selected to apply to the Denial of Service Protection Rule
The firewall maintains a list of source IP ad dreesses that it is blocking in the IP block list.
The block list is populated by a match to a classified Denial of Service Protection policy and profile, or populated by a match to a Vulnerability Protection Profile.
The block list, under Monitor -> Blocked IP List allows several features:
- Displaying of blocked IP addresses
- Get detailed information about a blocked IP address
- Displays a total count of IP addresses that are hardware offload blocked, and software blocked
- The ability to delete an IP address from the blocked IP address list
- Change the source of information about IP addresses that are listed
- Modify the duration that IP addresses are blocked by hardware
Note that hardware offloaded IP address blocking is only supported by some higher end Palo Alto Firewalls, these are:
- PA-3050
- PA-3060
- PA-3200 Series
- PA-5000 Series
- PA-5200 Series
- PA-7000 Series
Configure firewall packet buffer protection
Packet buffer protection allows an administrator to protect their organisation firewall against single-session denial of service attacks.
Packet buffer protection is session-based and is applied on a zone by zone basis. A percentage measure of the packet buffer used by a session is measured, with several thresholds that can be triggered: Alert, Activate, and Start Block Hold Time.
Alert logs that a threshold has been exceeded, but does not drop any packets
Once the activate threshold is triggered, random early discards (RED) will activate to discard session packets. If random early discard protection cannot reduce the packet buffer when the Block Hold Timer expires, the session is discarded.
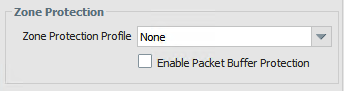
To configure Packet Buffer Protection, under the Device tab in the firewal select Session. Click the cog for session settings and modify the Packet Buffer Protection sessions as desired.

Once configured in the session settings, navigiate to the Zone configuration section, and open the zone you wish to activate Packet Buffer Protection on.
Packet Buffer Protection can be toggled on in this zone.
An administrator can manually discard a session abusing the packet buffer too. To identity the top five sessions using more than 2% of the system packet buffer, enter the CLI command:
show running resource-monitor ingress-backlogs
The above CLI command will report the session ID, percentage of the buffer used, the Source IP address and application name. This command can be run on any PA-3000, PA-5000, or PA-7000 series firewall.
If the return results use a common TCP or UDP port, yet the CLI output is unable to identify the application (indicating the application as undecided), the session could be attack traffic. The application is displayed as undecided when the firewall is unable to obtain enough information to determine the application in use. If a high amount of traffic is passing through the firewall in a single session yet the application is labeled as undecided, this could be deemed suspicious.
To discard an identified suspicious session, enter the following CLI command:
request session-discard id <session_number>